I promised it last week, and here it is: the Sacher cake recipe from my last book "Chocolate", and a step by step guide showing how to make chocolate "wax" seals. And why? Well, to celebrate that a few days ago
Nigella Lawson(yes, THAT Nigella)
recommended following me on Instagram and shared a photo of this cake. That does not happen every day, but fortunately
I reacted with the calmness that characterizes me.
The Sacher (Sachertorte in German) cake is originally from Vienna. It was created by an apprentice pastry chef, Franz Sacher in 1832. This young apprentice decided to place a layer of apricot jam between two rounds of chocolate cake, then enrobe the whole with a chocolate couverture, and change the course of patisserie history. The secret of this cake is closely guarded and has been the subject of plagiarism and disputes between the Hotel Sacher and Demel bakery (the dispute was won by the Sacher Hotel, which is the only ones authorized to use the name "Original Sachertorte"). The original recipe therefore consists of two sheets of chocolate cake, filled with apricot jam and coated with a chocolate glaze. In Demel's version the jam is on top of the sponge but under the chocolate covering. It is a somewhat dense cake, so it is often served together with unsweetened whipped cream.
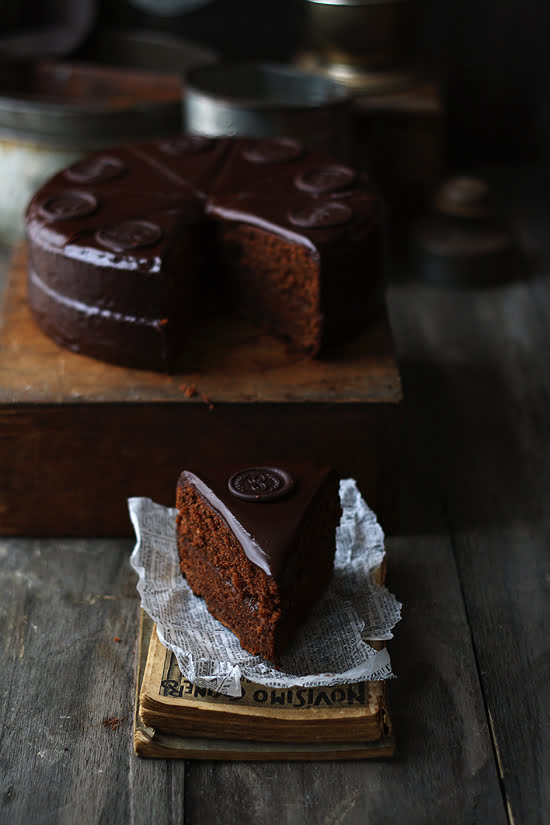
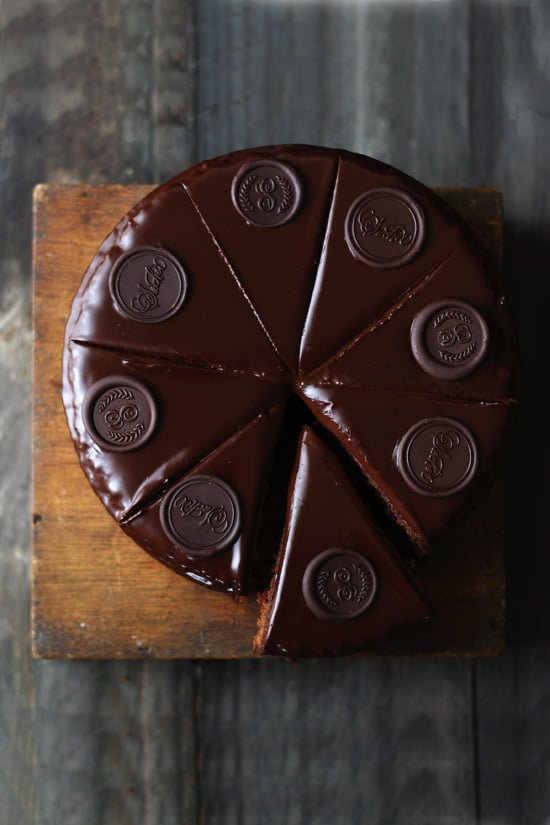
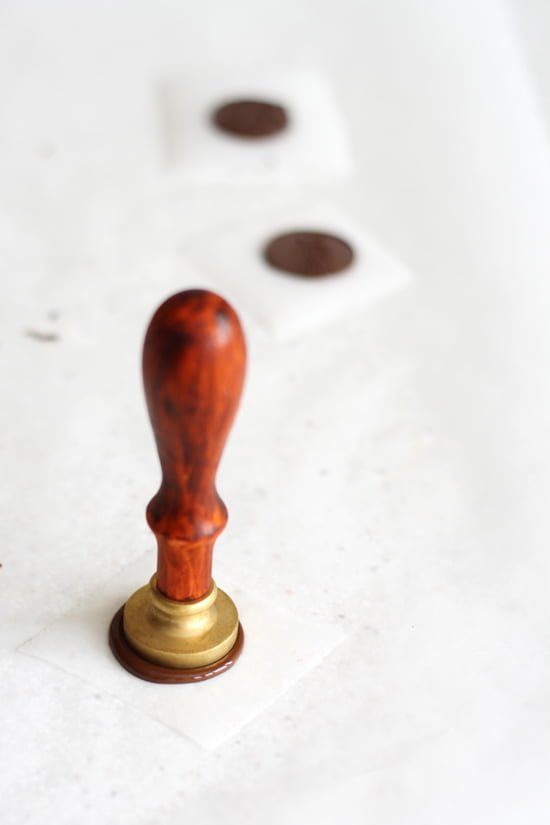
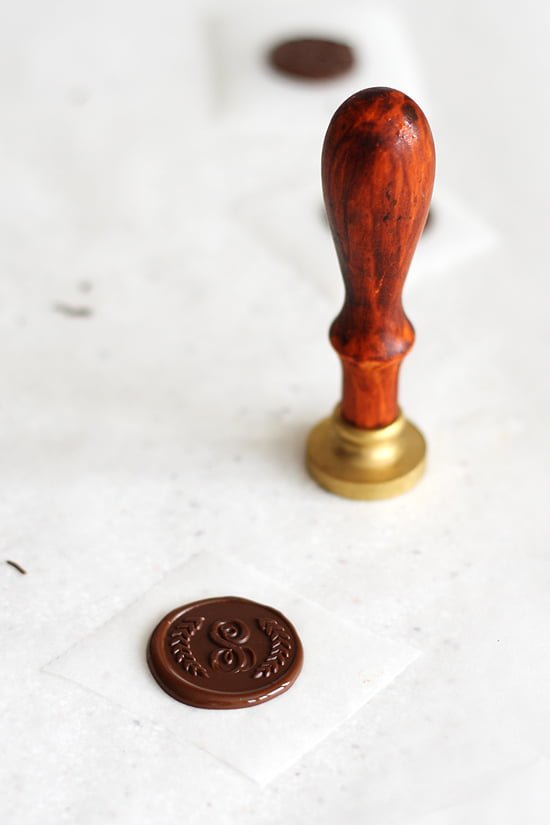
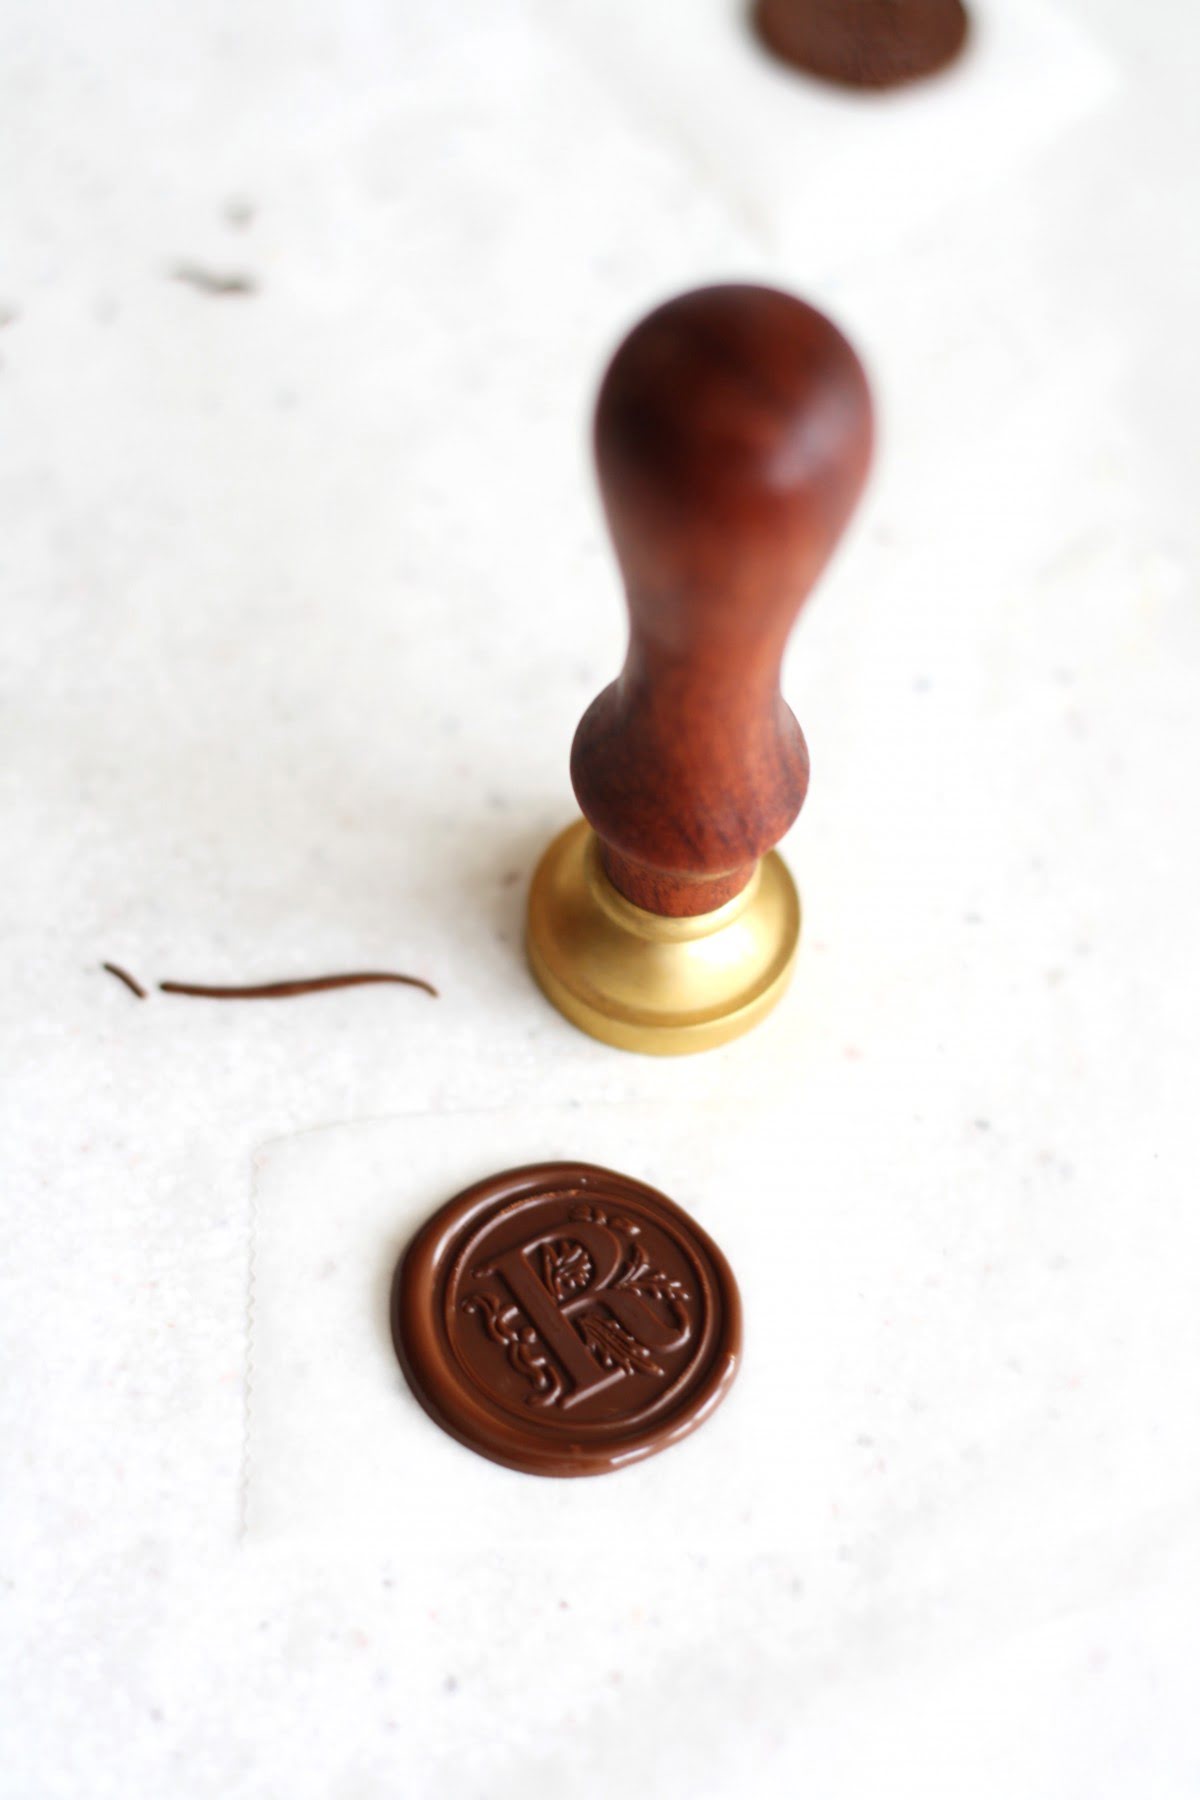
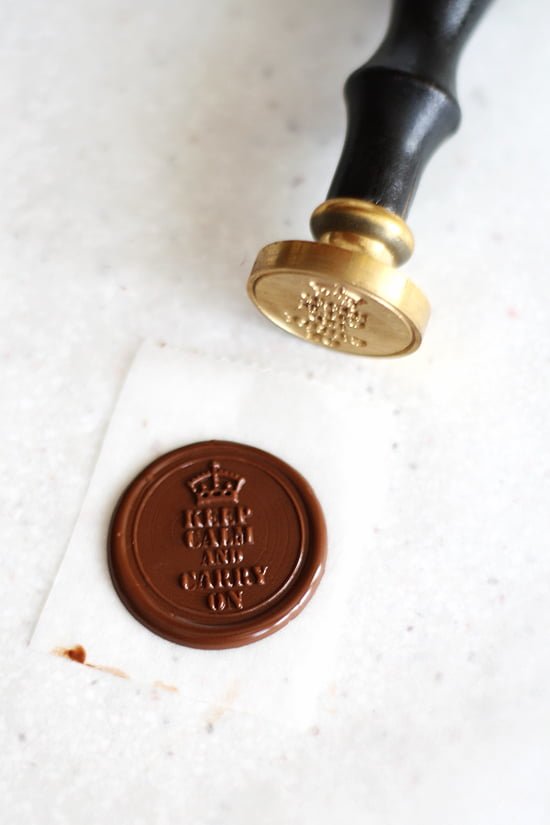
The version of the cake that I share with you today is of course, not the original, but my own. To avoid mix ups, the Original Sacher cake is decorated with the official Sacher chocolate seal, and that's what I tried to recreate here. The technique for making chocolate "wax" seals is simple and quick, and will allow you to decorate countless desserts and sweets: custards, puddings, cookies, cakes, pies, ... These chocolate seals, I found them at
Sprinkle Bakesand
Once Wed, both of them using this technique to decorate some cupcakes. I bought my seals at
Backtozero
Sacher Cake
Prep time: 15 min
Cooking time: 45 min
Yield: 20 cm (8 inches cake)
Ingredients
- Chocolate cake
- 6 eggs
- 200 g sugar
- 150 g butter
- 150 g chocolate, 55% cocoa
- 150 g self-rising flour
- 50 g ground almonds
- Apricot filling
- 200 g apricot jam
- Chocolate glaze
- 200 g de chocolate, 55% cocoa, chopped
- 200 ml heavy cream
- 50 g butter
- Chocolate seals
- 100 g dark chocolate, chopped
- wax stamps
Directions:
- Preheat oven to 350º F (180 ºC). Prepare a 20 cm cake pan (8 inches).
- Melt chocolate and butter, and set aside. Beat sugar an eggs for about 5 minutes, until pale and fluffly. Add cooled chocolate cream, and beat again. Fold in the ground almonds and flour. Pour the mixture into the prepared tin and level the surface.
- Bake in the oven for about 45-50 minutes, or until well risen at the top and the cake springs back when lightly pressed with a finger. Leave to cool in the tin for a few minutes then invert the cake onto the rack. Cool completely. Using a long serrated knife, cut the cake horizontally into two equal layers.
- Heat the apricot jam and spred evenly over one half of the cake. Place the second cake layer on top
- Make the chocolate glaze by chopping the chocolate into pieces. Heat the cream until hot, remove from the heat and add the chocolate. Stir until the chocolate has melted, then add butter, and stir again. Then pour the glaze over the cake, allowing it to run down the sides, being sure that the glaze completely coats the cake. Cool until the glaze is set, and refrigerate until ready to serve. Remove the cake from the refrigerator about 1 hour before serving.
- To make the chocolate wax seals, place metal wax seal stamps in the freezer for at least one hour before you start. Line a baking sheet with parchment paper. Drop small amounts of melted and tempered chocolate onto the parchment paper. Remove a stamp from the freezer and quickly place the stamp onto a mound of chocolate, press down gently then release. Let the stamp stand pressed in the chocolate for 15 seconds. Lift the stamp. You should be left with a clear impression in the chocolate. Replace stamp in the freezer for a couple of minutes, and repeat with remaining melted chocolate. Refrigerate finished chocolate seals until firm. Here you have a small video showing the process
- Finally, place a chocolate seal on each portion of the cake .
- This recipe is included in my new book "Chocolate" which is available in Amazon and in The book depository (in Spanish)
- If you have prepared this recipe, and want to send me a pic and your comments, please use this form . If you wish to subscribe to receive my recipes in English please do it here